Friday 9 December 2011

Morpher tool


Having removed the turbo smooth and cloned 3 other versions which I edited to have different facial expressions, I then applied these to the orginal in the morpher menu.

Tuesday 6 December 2011

Eyes

For my eyes I created a eye white, cornea, iris and pupil. I created materials for each. For the pupil was plain black, the iris I used a iris texture from here and applied a uvwmap and used shrink wrap. For the cornea and eye white I made reflective materials using raytrace, freshnel.

Thursday 20 October 2011

Adding detail

Having created a new material in 3DS max and adding the photoshoped image to it I can clearly see some areas that need colour added. Once these where changed I added a bump map to mack the texture more realsitic but lowered the setting to 7 as it made my skin look aged at the standard setting of 30.
I changed the rendering settings so that the output size was 1600 width and 1200 high and of high quality.

Reflection so far


This is the rendered image of my modelled head so far. I am fairly happy with how it looks. I think the cheeks could be a bit rounder and once eyes and hair have been added it should resemble me more. Having said that, I am very pleased with the amount I have learnt from this assignment and although I found some things difficult I am now much more competent with using the relevant modelling software packages then I have even been before. This ability has been reflected by me completing each stage in a reasonable timescale.
If I was to do this assignment again I am confident I would be able to do about 70% of it without having to refer back to the tutorials and would complete it in less then half the time. Things I would do differently would be to ensure all reference drawings are done with the least amount of topology, this will make the modelling stage easier and taking more time on complex parts, such as the ear. I would like to finish my head by creating eyes and hair and also use the morpher tool to animate some facial expressions.

Face Mapping Continued


I had problems with mirroring my map parameter. This was resolved my adding a unwrap uvw map above the symmetry on the modifier stack. I then continued to line up and weld (Ctrl W) the verticies.
I saved the map as a JPEG and opened it in photoshop to make a mask as a guide for my texture. I resized the mask to be smaller than my orginal photographs so the the resolution would be better. I then started using the laso tool to cut and paste chunks of my face into place.
I used the patch tool to smooth out the harsh lines between the different shades on my face as the two reference photos had slightly different hue and saturation.
Having created a new material in 3DS max and adding the photoshoped image to it I can clearly see some areas that need colour added.

Mapping Face


To apply a material to my face I first began with applying a Unwrap UVW modifier under Symmerty in the modifier stack. I selected the all polys apart from my ear and applied a checkered material to it, I had to increase the tiling on this to view more clearly.
I then edited the verticies in the map parameters so that there were none overlapping or inverted faces.
For the ear I had many difficulties and was unable to use the pelt tool. I found unselected polys and additional seem lines which I rectified but still the pelt tool would not work properly. I then decided rather than spend more time on this section I would either use a plain material or try to rectify at a later date.

Wednesday 19 October 2011

Eyes


To make my eye lids I selected the polygons above my eye and created a very small inset.
I did not finish eyes at this point as I wanted to move on and get a material on my face therefore will come back to these at a later point.

Stitching and Attaching Ear


To attached to ear to the head I had to create the same amount of polys on the head to match those on the ear so that it can be attached. I found that I had to create new verticies to still get the polys to flow like on the topology.
I attached the ear using the attached settings button when I had the head selected and attached the ear to it.

Monday 17 October 2011

Ear complex forms

To create the complex shapes of the ear not only did I move the veticies but I also used inset and chamfer to create additional ridges and detail. Such as I did with my lips I made sure there were no flat edges to help make a more smoother, rounded and organic model.

Ears


This is my ear topology.
I drew lines around each topology line making sure that both initial type and drag type were both set to corner and snap was turned on. Once I had drawn around all the lines I selected one shape added a extrude modifier to it, cnverted it to an editable poly. Then attached all the others using the attached settings to select all the other lines and then welded them togther to be one object.

Lips

I moved the lips inside the head so that they didn't have flat edges and appeared more rounded.

Finished Head


This is my finished head and neck. There are a few abnormal bumps in my head which I have found difficult to rectify but feel if I but hair on my head these will not be seen. I am happy my neck and shoulders and think they look fairly life like. Once I competed these I attached them to my face so that it was one object. I had to manually check that each verticy had attached as some did not.

Tuesday 11 October 2011

Head and Neck

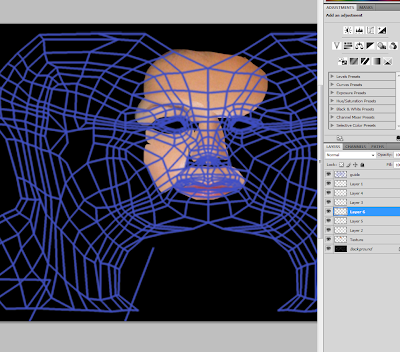
This is the progress of my head and neck. I have found there is a lot of geometry then is needed because of having to match the geometry in my face. I can see that there will be a lot of tweeking to do, which I wil do when I have finished the bulk of my head and neck.

Monday 10 October 2011

Head Continued

I have found modelling my head is not as straight forward as I thought it would be. My hair covers part of my head so I can not see the the shape properly and the shape I have made does not look right to me. This may be due to the fact I have never seen my head bald before.

Friday 7 October 2011

Head Continued


This is my progress of my head. As I have a complex face with lots of polygons it is proving to be a time consuming task to model my head to match my face.

Thursday 6 October 2011

Primitive Extension

I reduced the amount of polygons on my head by collapsing half of them and using the ring tool to select them.

Finchingfield Research

As part of the history research on Finchingfield I went to Chelmsford records office and found some photographs, I will be going back to see if I am abe to take copies of any of them that may be relevant. I also went to Brintree library as Finchingfield is under Braintree Council, there was not many books but there was one on tales of the village which has given me an idea that rather than just do a tour of the Guildhall for the animation, it may be more interesting to have some sort of story. Such as the gentlemens reading club, the school children and how they might of been punnished, or the local bobby using it as a lock up. I will share this idea with the group at our next meeting.

Tuesday 4 October 2011

Primitive Extensions


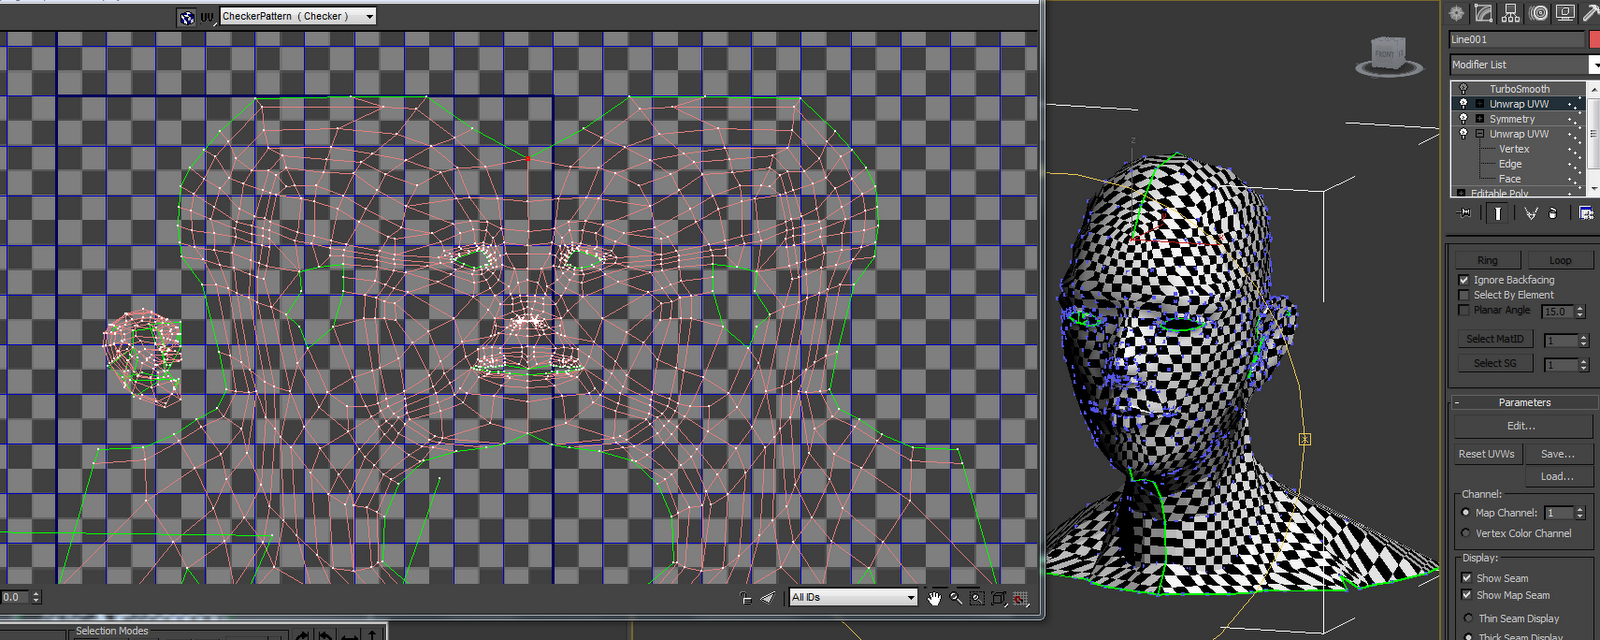
To create my head I first added additional topology lines to my head and neck. I then created a sphere and adjusted the orientation and scale to fit my head.
I chenged the amount of segments in the sphere to match the existing topology. I then added a edit poly modifier to the sphere and deleted the unwanted ones.

Monday 3 October 2011

Refining details


With turbosmooth activated it is easy to see where detail needs refining. When actually refining details it is easier to do with turbosmooth deactivated.
I created my nostril by selecting edges in editable poly and while holiding shift either scaling or moving them to go inside the nose. I also moved some of the vertices on my nose to make it not so pointy.

Face Modelling - Symmetry and Smooth


Symmetry
Part 5 video tutorial shows the different ways of mirroring an object. These include using the mirror tool and applying a symmetry modifier. For this project it was decided that using a symmetry modifier is best for the reason it is a more powerful tool and more changes can be made easily.
Smooth
Again was shown the different ways to smooth an object. The two ways were selecting NURMS subdivision on the editable poly and adding turbosmooth modifier to the symmetry. For this project the turbosmooth was used as it causes less pinching on the model.

Guildhall Plans

I have tried to find the plans of the Hall so that they can be used as references when modelling. First I looked at the planning doctuments on Braintree District Council's website which only had the location plans. I will go to Chelmsford records office to try and find some earier plans as we will be animating the hall on its history.

Finchingfield Trip and Research

Finchingfield Research 26/09/11
History
1470 - Grade 1 buliding. First built. Was a school room. Upper room used as celebratory room.
1500 - The reformation (started reign of King Henry VIII). Hall fell into disrepair until brought by Mildmay.
1620 - Robert Kempe brought and sold to villagers. Deeds state hall should be used as a school and almshouses and land was given.
1630-1658 - Civil war - what happened? Not much information.
1900's - only one occupant left in the almshouse early photo displaying render falling of building, generay air of decay.
1938 - the vicar wrote to Charity Commission and new scheme set up. War delayed repairs.
1950's - Repairs began
Many materials used to repair are modern. Some orginal features remain.
Restoration
English Heritage declared "at risk".
The project will:
- modern materials stripped out
- roof removed and repair
- timber frame repaired
- walls coated with lime render
- repairs to wattle and daub
- modern partions removed
- insulation, heating, kitchen amd wc facilities installed
Finchingfield Trip 30/09/11
Whilst on the Finchingfield trip I took notes from the talk we had from the guildhall trustees and around the tour I took pictures.
Notes taken:
The Guildhall has been part of the community for around 600 years. It was a Trinity guildhall and built in 1470 until the reformation in the 1600's. Mr Kemp sold the deeds to the gentelmen of Finchingfield and the original document can still be seen in Chelmsford records office.
It was mentioned when it was used as a school how the children were punished. Alms were given to the poor. When children left school and stayed in employment for 12 months they got 10 shillings and a bible and boys got a pair of boots.
They are records of it being used as a lock up and Mrs Beckles being the last inmate. 1959 Almshouses fell into disrepair, 1953 public meeting held, formed friends of guildhall. Converted into 4 almshouses, parish room and library. 1959, only women, spinsters of the parish were allowed in almshouses.
Was restored to library and not almshouses and celebration hall.
Leg family donated paintings, Mrs Tealeas, Shepard, Ladys gleansing, Map - was discovered in chest.
Gatling gun in library. Dody Smith lived in Fichingfield wrote 101 Dalmations also Norman Lewis another aurthor.
There was 6 trustees which had to include the vicar and the owners of Spains Hall. Has now been increased to 30 volunteers.
£1m donated from national lottery fund.
In 1818 there was a men only reading club.

Tuesday 27 September 2011

Creating a Surface


Having completed the slines I then made them into a surface by converting into an editable poly and in the edit geometry selected attach and attched all lines.
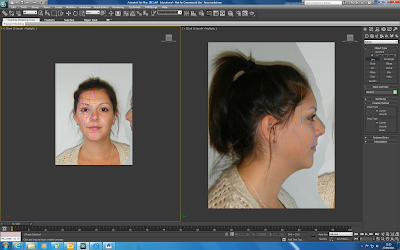
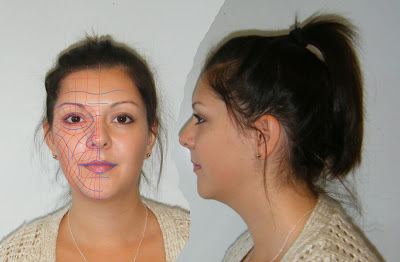
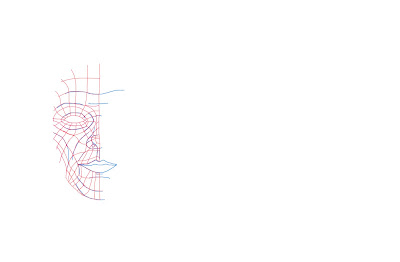
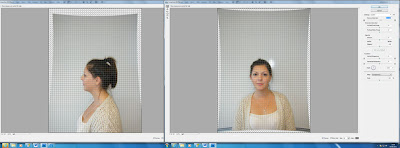
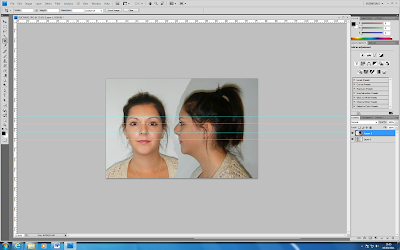
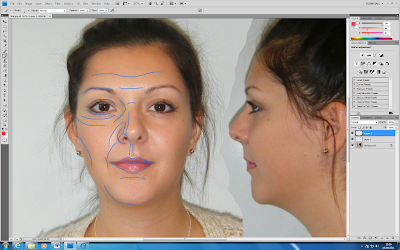
The topolgy is flat so to give it depth I used my other reference plate. Before this I needed to weld the mesh as the vertices were seperate.
By selecting the middle vertices only I straightned them using make planar tool X. Using the move tool I dragged the vertices on the X axis only.
I made the object see through by using key board short cut Alt X. I continued moving the vertices whilst trying not overlap then too much. Places such as the eye where unavoidable though.

This is how far I got today.

Monday 26 September 2011

Reference Setup and Using Splines to Model Head

Reference Plates

This involved creating two planes adding the topology picture to them via a bitmap. Using Bitmap fit to resize correctly and uvw-map gizmo to center. Setting the self-illumination to 100% so that the picture can be clearly seen at all angles. Then freezing the reference plates with 'in grey' setting unticked.
Modelling Process
To make to screen easier to work on I set up the viewports to be side by side in the configure - layout tab - viewport options and turned the grid off.
To start the modelling process I started by drawing lines and making them into splines over the top of the topology lines previously drawn. I ensured that the corner settings were set on the creation method and snap to vertex was on. When working on tighter areas such as round the eyes I lowered the pixel radiuos on the snap options.

As you can see in the picture above I followed the advice stated on the tutorial video of not putting in all the detail if it was not needed at this stage as it can easily be added later on. From previously working with 3DS max I know that the less amount of polygons are in a model the better the program will run.

Revised Topology


After reviewing my topology lines with Richard it was noted that they did not flow naturally across my face nor were they all four sided shapes. As stated before it is vital to have these aspects in the topology for 3dsmax to work correctly with them. Therefor I started again and managed to finally draw lines that would be acceptable.

Wednesday 21 September 2011

Completed Topology


Here is my completed topology. This was my second attempt from starting from scratch. I found it difficult to follow the key features on my face whilst keeping triangles and odd shapes to a minimum.

Monday 19 September 2011

Week 1 Reflection on Brief and first task

My initial reaction to the brief was that modelling my own face would be a difficult task and the final model would be unlikely to resemble me. However a good source of video tutorials have been provided that will guide me through the process in detail http://cg-india.com/tutorials/3dsmax_tutorials_organic_modeling.html.

The first step was to line up my front and side view photographs so that they can be used as references when modelling. By using the lens distortion tool in photoshop and rulers as guides I flattened out my face and lined them up exactly. I had to take a second set of photographs as the first ones were too different to get a good match.

After this I was able to start on my topology of my face by drawing lines. I did this by defining my basic features then building quads whilst trying not to draw triangles as these cause problems in 3DS Max.

I hope to have this stage finished by next week.

I am looking forward to the group project as I will have the opportunity to use more of my own creative initiative when planning. We decided to research Finchingfield Guildhall individually and meet before next lecture to discuss our findings.